
DIY Oxford Shoe Makeovers: Paint, Studs, Glitter, and Print
How to refresh classic Oxford lace-ups with color blocking, studs, glitter, florals, and animal print—plus prep and sealing tips so the makeover survives real wear.
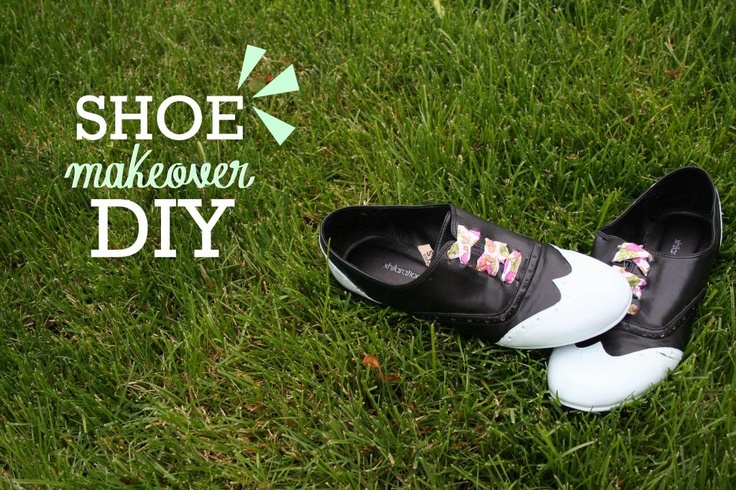
Oxford shoes sit in a useful middle ground: formal enough for work, casual enough for weekend denim, and structured enough that a DIY makeover still looks intentional instead of craft-table temporary. A flat lace-up upper gives you a canvas—smooth leather, patent, canvas, or faux leather—while the closed lacing keeps the silhouette recognizable even after paint, studs, or print.
The projects below follow the makeover ideas that filled DIY fashion blogs for years: color blocking, glitter, studs, florals, animal print, and soft pastel refreshes. Keep the original toe shape and sole; change the surface. That is the whole game.
Prep that decides whether paint lasts
Clean first. Wipe dust and street grit with a slightly damp cloth, then let the shoes dry fully. For leather or faux leather, a gentle wipe with isopropyl alcohol on a cotton pad helps paint grip; test a hidden spot near the tongue first. Mask the sole edge with painter’s tape if you want a crisp line between upper and outsole. Stuff the toe with paper so the vamp stays rounded while you work.
Choose materials that match the base. Acrylic craft paint plus a flexible fabric or leather medium works on many synthetics. Leather paint or angelus-style shoe paints flex better on real leather. Fabric paint suits canvas Oxfords. Glitter needs a clear flexible topcoat or it migrates onto socks. Metal studs need a leather punch or strong adhesive rated for footwear—not ordinary school glue.
Work in thin layers. One heavy coat cracks at the flex points across the vamp. Two or three thin coats, dried between passes, survive walking. Always seal with a clear matte or satin finisher meant for shoes if the pair will leave the house. Replace laces before you paint if drips might land on them, or remove laces entirely and mask the eyelets so pigment does not glue the holes shut.
Set up a tray lined with newspaper in a ventilated spot. Flip the shoes onto their sides to reach the outer quarters without smearing a wet toe. If you are painting a matched pair, finish the same panel on both shoes before switching colors so the blocks stay consistent.
Color block and two-tone classics
Black-and-white blocking is the Oxford makeover that still reads polished. Paint the toe cap one color and the rest of the upper another, or split the shoe vertically along the lace line. Tape is your friend: burnish the tape edge so paint does not bleed. Pull tape while the last coat is slightly tacky for a cleaner edge.
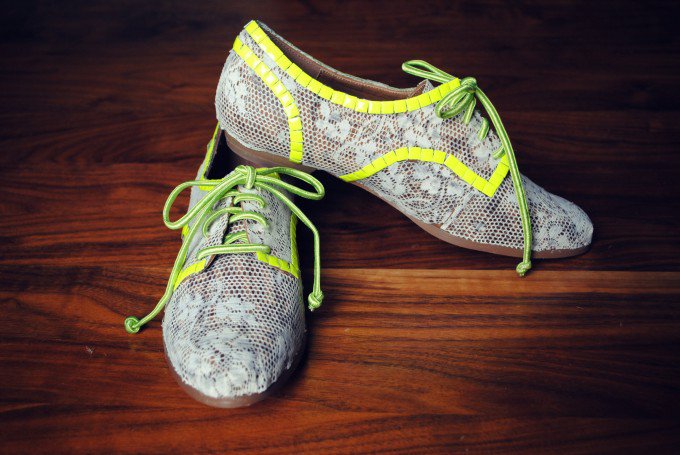
Bright accents—lime, coral, electric blue—work best as a single panel: tongue, heel tab, or a painted saddle. Too many neon zones fight the Oxford’s architecture. If you want drama and wearability, keep the toe and heel relatively quiet and put the bold color where the eye already lands when the shoe is laced.
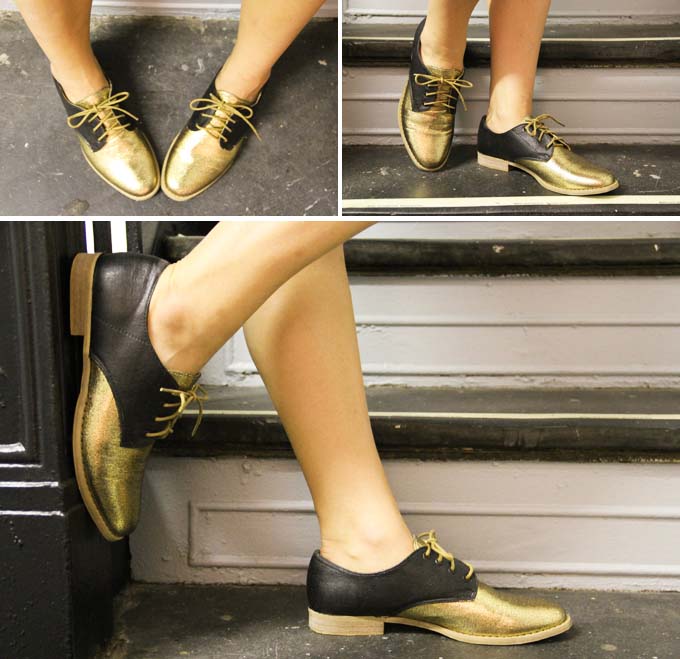
Color-block Oxfords with a glitter panel or a high-shine finish photograph beautifully and still read as fashion shoes rather than costumes when the base color stays dark. Matte black beside a metallic or glitter zone is a reliable pairing.
Soft pastels, bows, and “sweet” refreshes
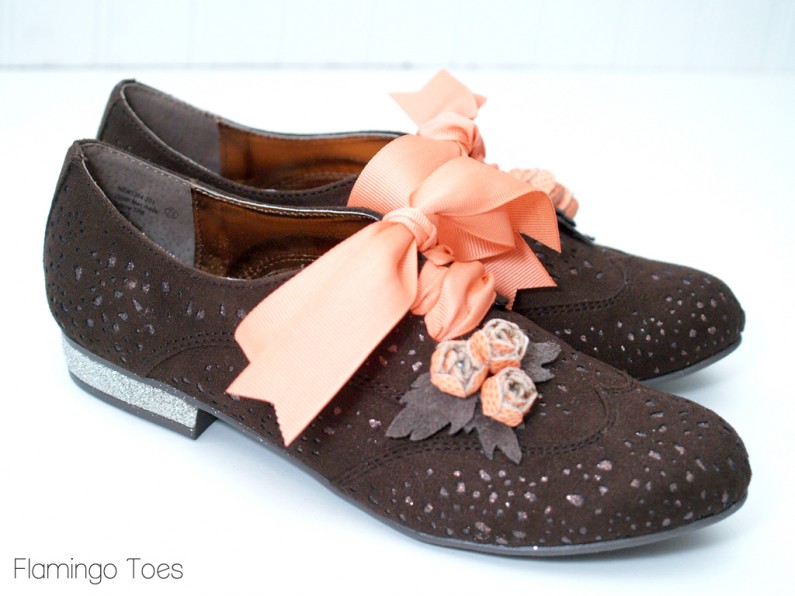
Not every makeover needs hardware. A wash of soft paint, new laces in grosgrain or velvet, and a removable bow clip can shift a scuffed pair toward spring outfits without permanent commitment. Remove decorative bows before rain; fabric trims soak and stain. If you sew a bow directly to the vamp, use a short stitch through the lining only so you can cut it free later.
Pastel Oxfords pair with dresses and cropped trousers. Keep soles clean—white or gum soles show every sidewalk mark—and consider a thin clear coat on painted areas that flex when you walk.
Sparkle, studs, and metallic edges
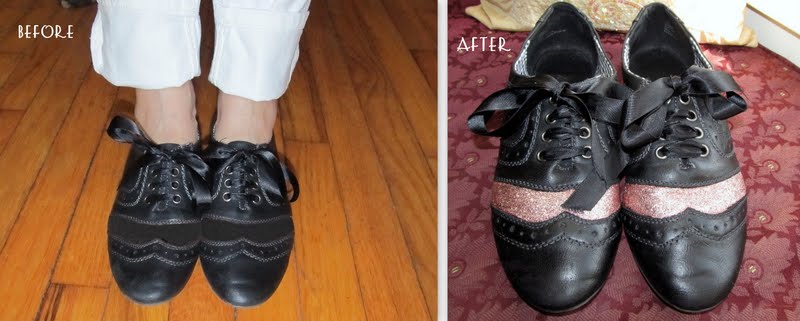
Glitter Oxfords are weekend and party shoes first. Apply adhesive in a controlled zone (toe cap or whole upper), sprinkle fine glitter, tap off excess, and seal thoroughly. Coarse glitter sheds more. Wear dark socks the first few outings until the finish stabilizes.
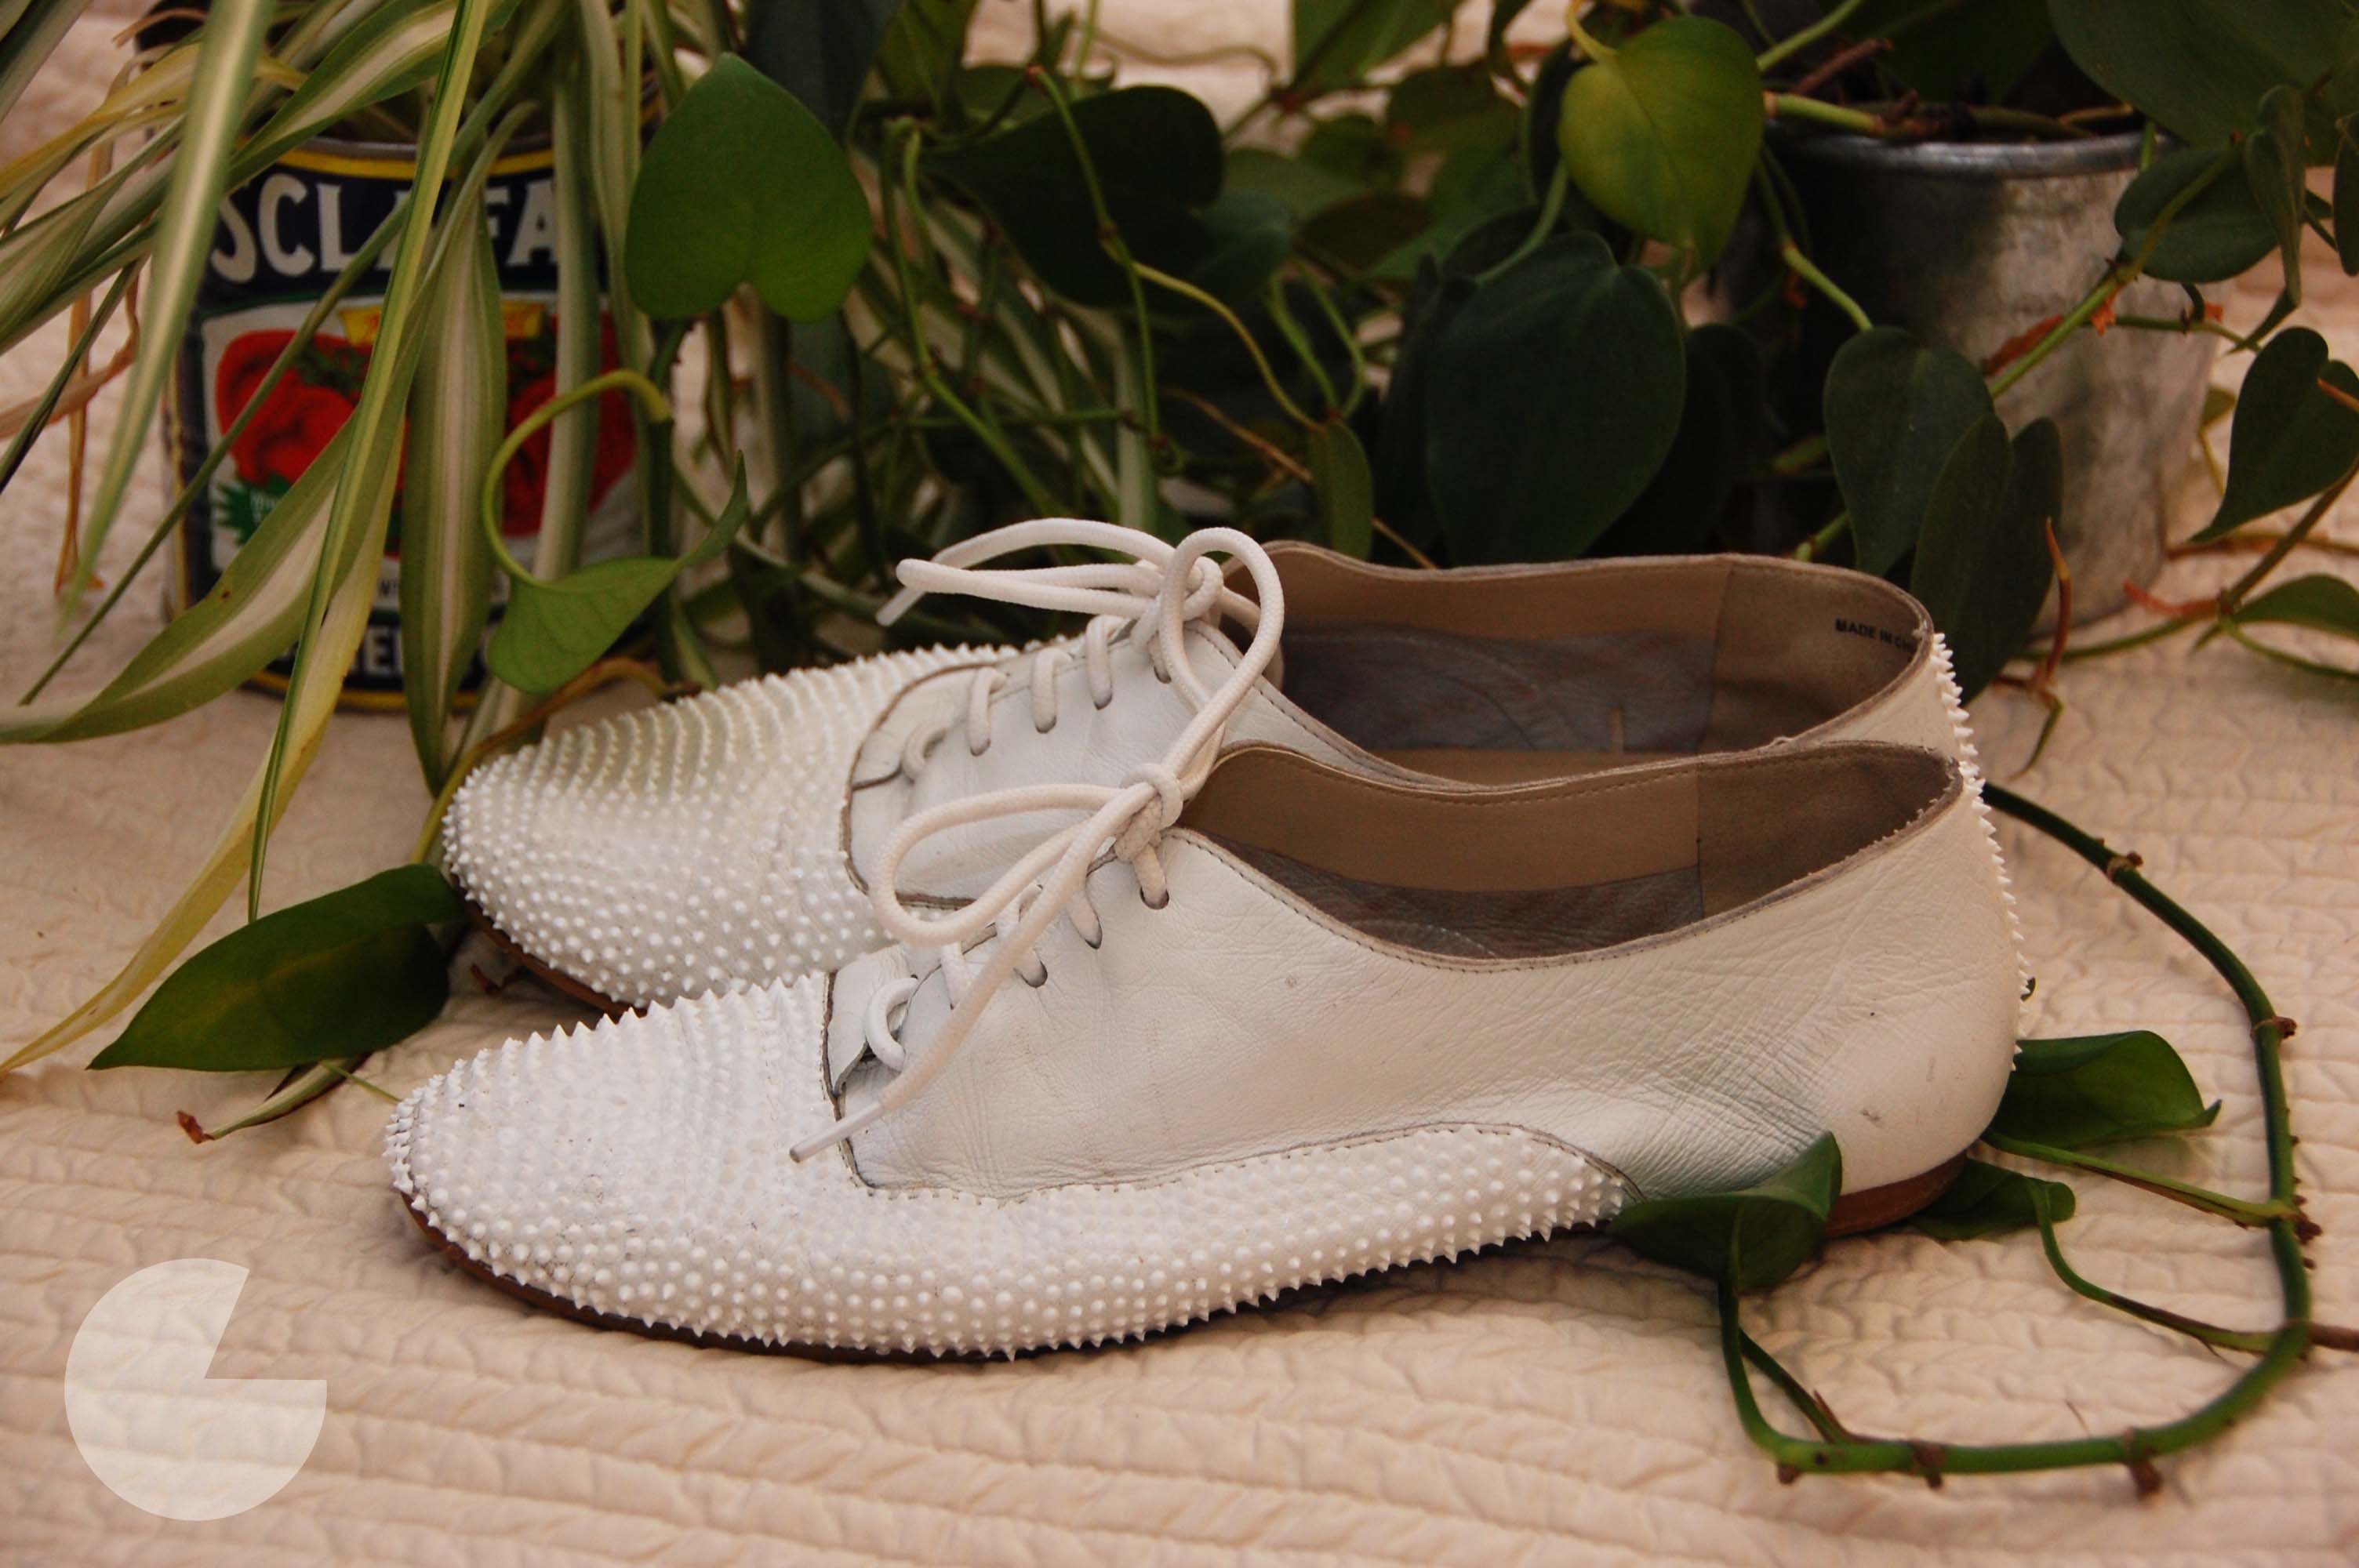
Studded Oxfords lean rock and street. Map the pattern with chalk or removable dots before you punch. Pyramid studs along the lace line or toe perimeter look deliberate; random coverage can look unfinished. If the leather is thin, back the studs with a small piece of interfacing or a drop of clear adhesive so they do not pull through. Check for sharp backs that could scratch ankles—trim or cover them.
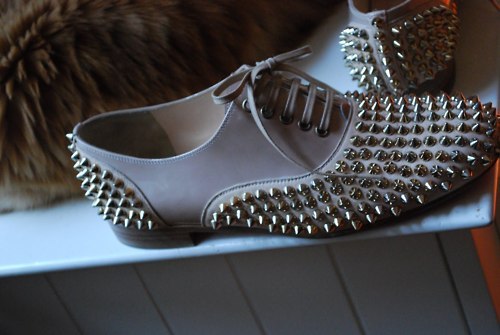
Grey or muted bases with silver studs feel quieter than black-on-black hardware. That calmer contrast works for daytime outfits where full punk studding would overwhelm.
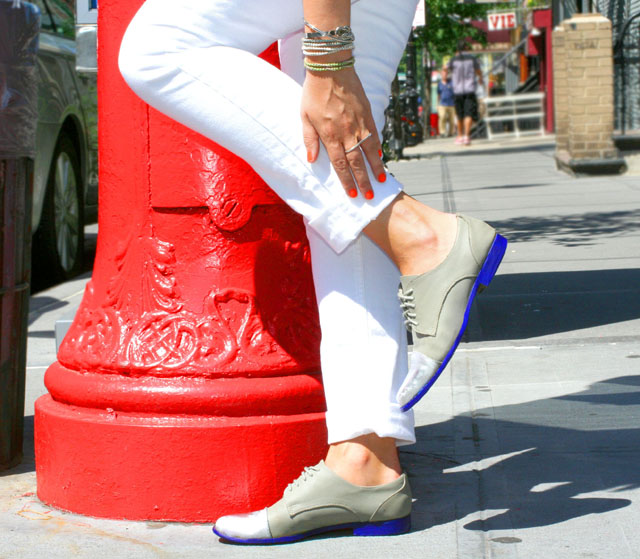
Metallic paint—silver, pewter, soft blue foil effects—catches light on the rounded Oxford toe. Dry-brush techniques leave some base color showing and look less like a plastic toy than a solid metal dunk. Seal metallics well; they scuff at the toe first.
Florals and animal print
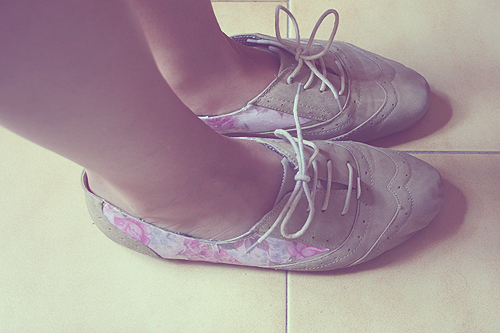
Floral Oxfords work with stencils, fabric markers, or decoupage of thin paper sealed under many layers of clear coat. Decoupage is less flexible than paint—reserve it for occasional wear shoes. Hand-painted blooms on a cream or navy base look more expensive if you limit the palette to three colors and repeat a simple motif rather than covering every square centimeter.
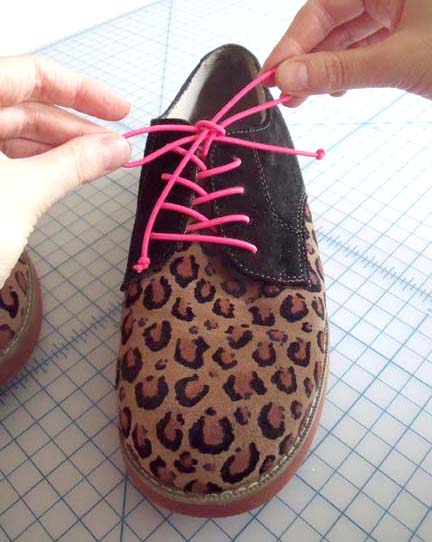
Leopard and neon pairings are louder by design. Sketch irregular spots with a pencil, fill with brown and black, and leave breathing room of base color so the print does not turn muddy. Neon laces or a neon heel stripe can echo the print without painting the entire shoe in fluorescent pigment, which tends to chalk and fade.
Wear, care, and when to stop
Let paint cure longer than you think—overnight is a minimum; forty-eight hours is kinder. First wears should be short indoor tests. Flex the vamp gently with your hands before the first outdoor walk; if a crease cracks, sand lightly with fine grit, touch up, and reseal. Avoid soaking painted shoes; wipe rain spots and dry stuffed with paper away from heaters that can bake and flake the finish.
Edge wear shows first at the toe and outer heel counter. Keep a small bottle of the base color and sealer for five-minute touch-ups. New laces are the cheapest style upgrade after paint—flat waxed laces look sharper on Oxfords than fat sport laces that fight the eyelets.
Some pairs are better left alone. Soft, peeling faux leather may reject paint. Expensive calfskin you still wear to interviews might deserve a cobbler’s polish instead of glitter. Scuffed thrift-store Oxfords, on the other hand, are ideal candidates: low risk, high reward, and a silhouette that still looks like a real shoe when you are done.
Pick one idea from the photos above—the black-and-white block, the studded vamp, or the soft pastel refresh—and finish that pair before you start a second. A single well-sealed makeover beats three half-dried experiments on the craft shelf. Which Oxford in your closet would survive a weekend of tape, thin paint, and a clear coat?

Comments
Continue reading
DIY Father’s Day Gifts Kids Can Help Make
Inexpensive, personalized projects—treats, stitched notes, shirt pillows, tie boxes, and desk sets—planned so kids can join in before Father’s Day.
16 DIY Travel Kits and Journals to Make Before You Pack
Sixteen handmade travel projects—emergency kits, cord wraps, passport covers, sleep masks, journals, games, and more—to pack smarter before the trip starts.
DIY Summer Sandals and Flip-Flops You Can Actually Wear
Upgrade basic flip-flops with fabric wraps, gladiator laces, macrame, fringe, and beads—plus fit checks and glue tips so handmade sandals last.