
21 Simple Tin Can Craft Ideas for Home, Gifts, and Parties
From punched lanterns and vertical gardens to desk caddies and wedding cans—twenty-one practical ways to upcycle soup, tea, and candle tins.
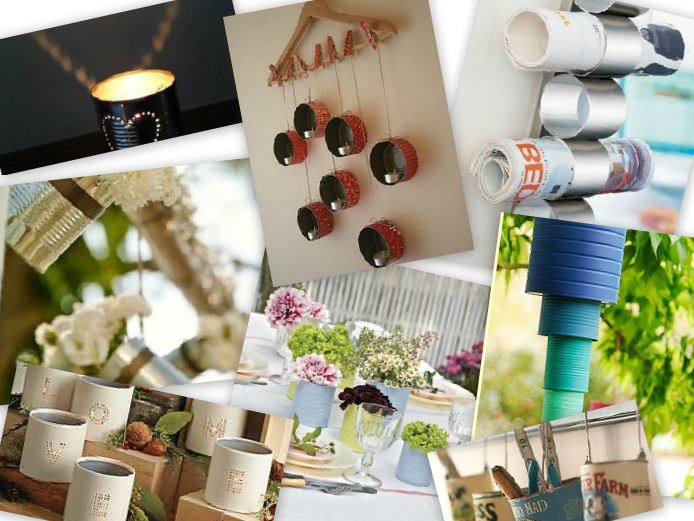
Tomato paste cans, tea tins, candle cans, and ordinary soup cans are some of the easiest DIY materials in a kitchen recycle bin. Wash them, peel the labels, check for sharp rims, and you already have cylinders ready for paint, paper, plants, light, or gifts. The twenty-one ideas below keep the original inspiration photos and focus on projects you can finish with basic tools: scissors, twine, a hammer and nail, outdoor-safe paint, and a little patience around edges.
Safety first: file or cover sharp lids, supervise kids when punching holes, and use LED tealights outdoors or anywhere fabric and paper sit nearby. Drill a drainage hole before soil goes in. Then pick a can size that matches the job—short tuna tins for pincushions, tall coffee cans for stilts, ribbed vegetable cans for luminaries that catch light in interesting ways.
1. Painted planters, cutlery cups, and desk cans
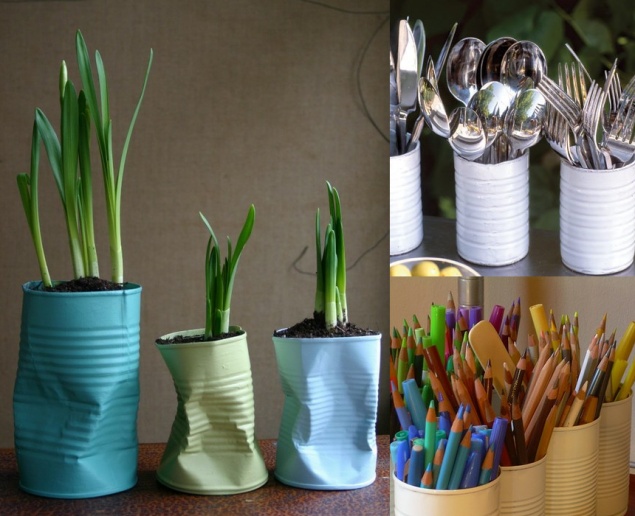
One weekend of matte spray paint can cover three jobs. Dent cans lightly for a crushed modern planter look in teal, sage, or sky blue; keep ridges intact and paint white for knife, fork, and spoon cups; or cluster cream cans as colored-pencil holders on a desk. The same prep—soap, dry, light sand, primer if the metal is glossy—supports all three finishes.
2. Lace and vintage paper desk caddies
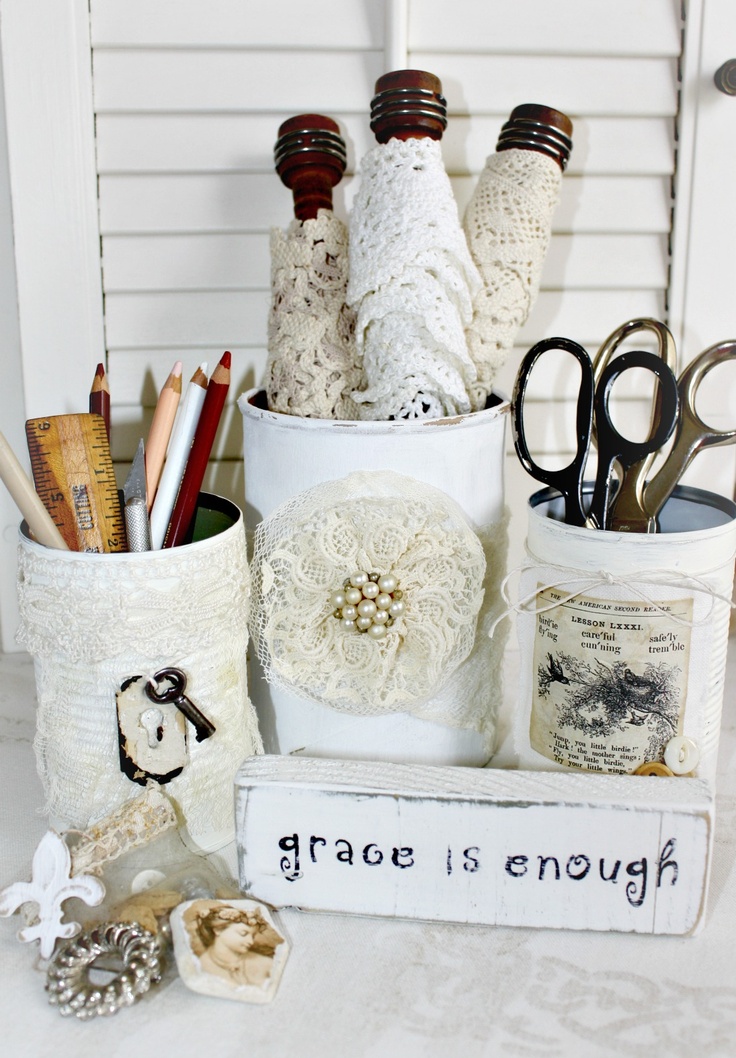
Paint cans off-white, then wrap lace, add a key charm, or decoupage a book-page scrap with baker’s twine. Group three heights for scissors, pencils, and craft knives. Soft textures hide the “food can” past without heavy hardware, and the set photographs well as a teacher or studio gift.
3. Burlap, lace, and flower centerpieces
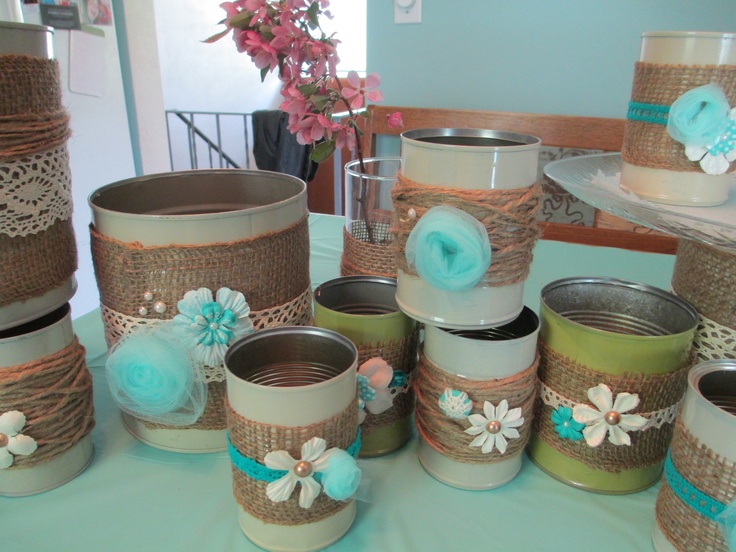
Wrap painted cans in burlap, layer white lace, finish with twine and fabric or paper flowers in teal and cream. Mix olive and ivory cans on one table so the row feels collected rather than identical. Use them as utensil cups at a buffet or as empty decorative vessels beside a simple vase.
4. Cut-metal filigree lanterns
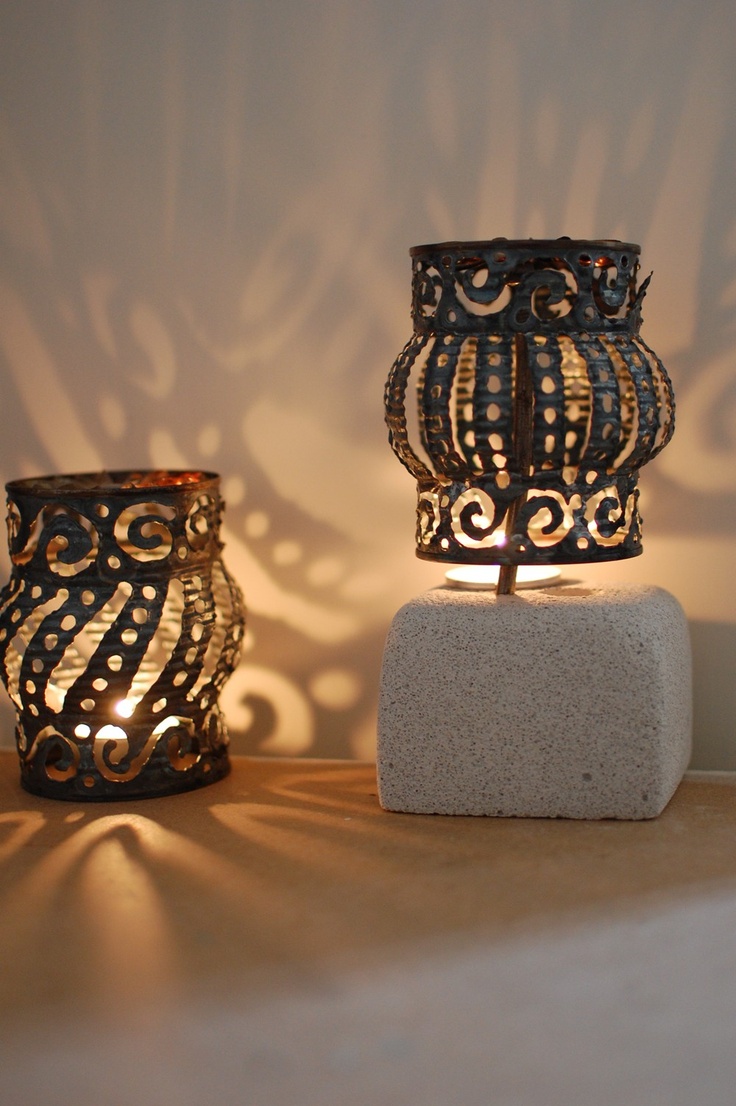
Advanced but striking: mark swirling cut lines, drill starter holes, then cut and punch until the can becomes a lantern that throws patterned shadows on the wall. Work slowly with gloves and eye protection. Seat a tealight on a stable base beneath or inside; the glow is the craft’s whole point.
5. Kid-sized tin can stilts
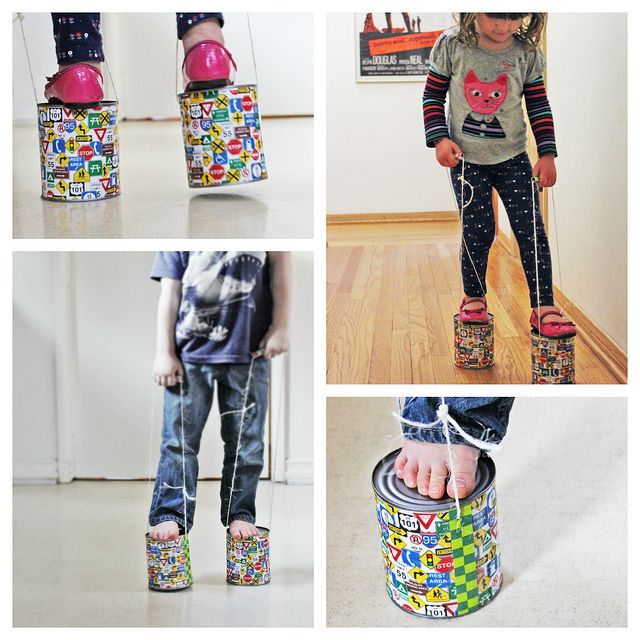
Large sturdy cans, holes near the rim, and thick twine loops make walking stilts. Wrap with lively contact paper, knot the string securely, and practice on flat floors with adult spotting. Check rims for burrs before any child steps on. Play value is high; supervision is non-negotiable.
6. White perforated votive lanterns
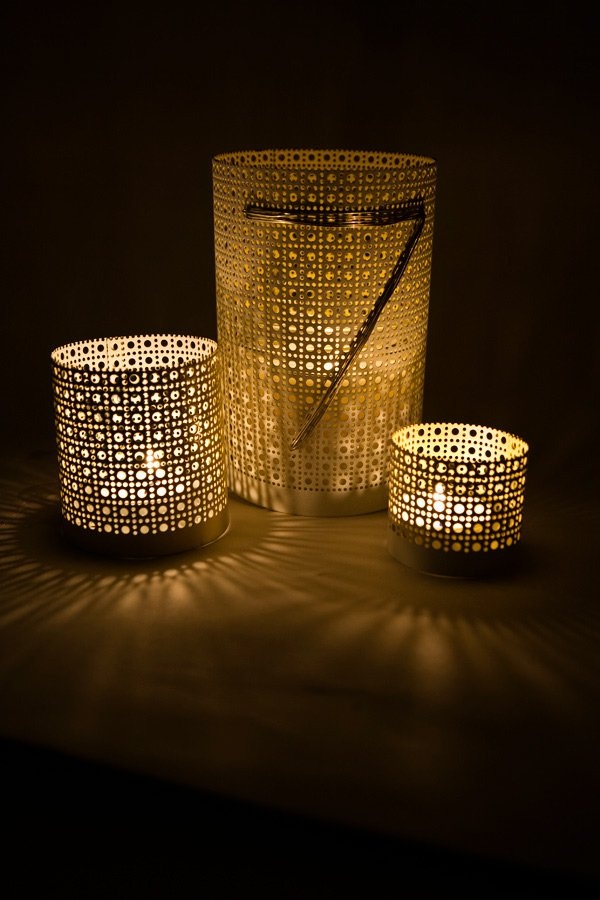
Fill a can with water and freeze it so punching holes does not crush the cylinder. Drill or nail a cane-webbing-style grid, thaw, dry, paint matte white, and add a wire handle if you like. Group three heights; the dotted glow on a dark table is the payoff.
7. Floral-paper art caddy on a turntable
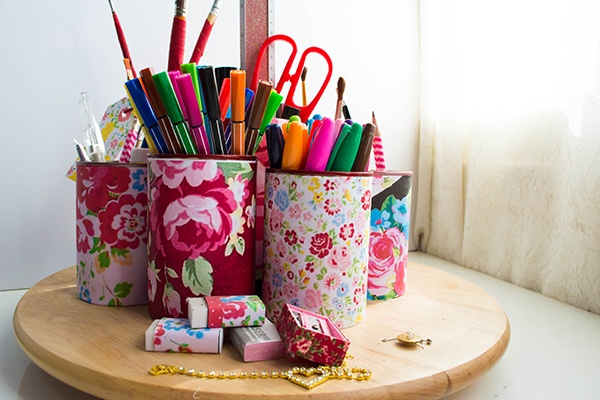
Wrap mixed floral papers around several cans, seal with Mod Podge or clear adhesive, and park them on a wooden lazy Susan with matching wrapped erasers. Sort markers, brushes, and scissors by can. Spin access beats hunting through a drawer mid-project.
8. Punched-flower tin lampshade
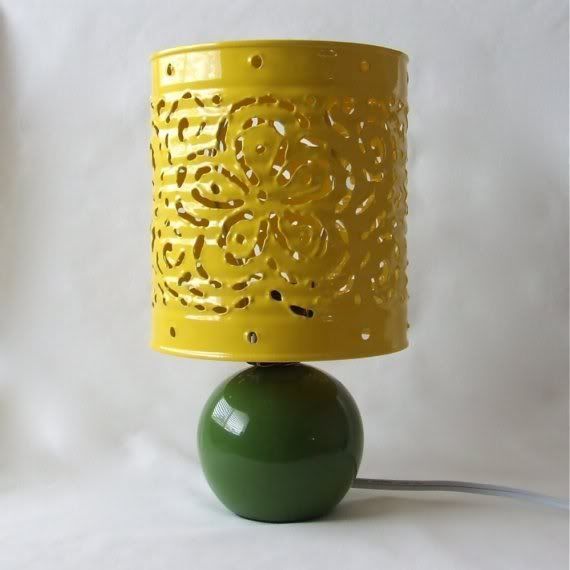
A bright yellow can with a punched floral filigree becomes a shade over a simple lamp base. Use a low-heat bulb or LED, secure the can safely, and keep cord routing tidy. Borders of tiny punched holes near the rims finish the folk-metal look.
9. Pastel banded wedding table cans
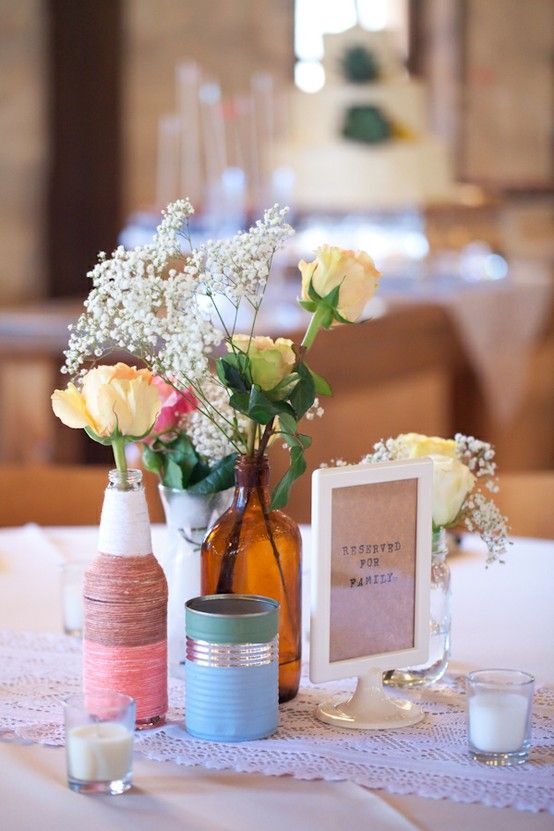
Paint the lower third pastel blue, leave mid ridges silver, tip the rim muted green, and set the can among bottles, roses, and votives. The metallic band reads intentional, not unfinished. Perfect when you want upcycled texture beside glass without matching every vessel.
10. Vintage tin floral vases
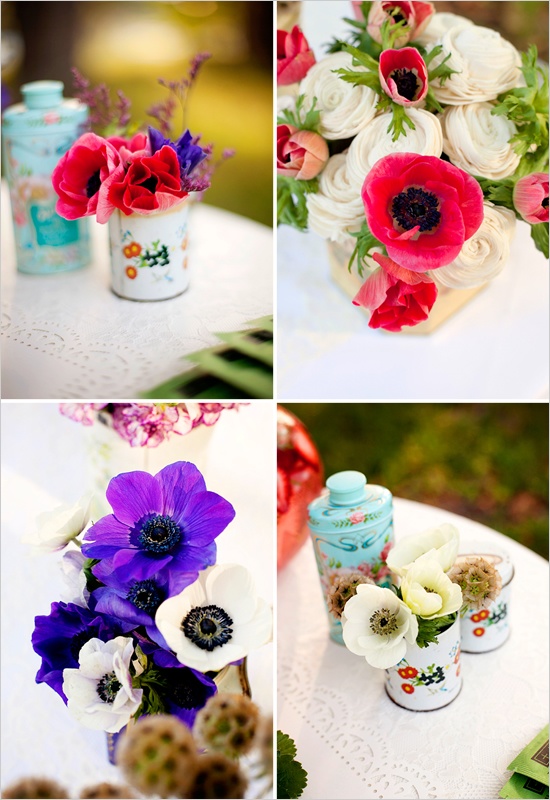
Printed tea tins and small floral cans already look finished. Fill with anemones, ranunculus, or simple garden stems. Pair a short white tin with a taller blue tea tin on lace for a shabby-chic tablescape that costs almost nothing beyond flowers.
11. Gold table-number luminaries
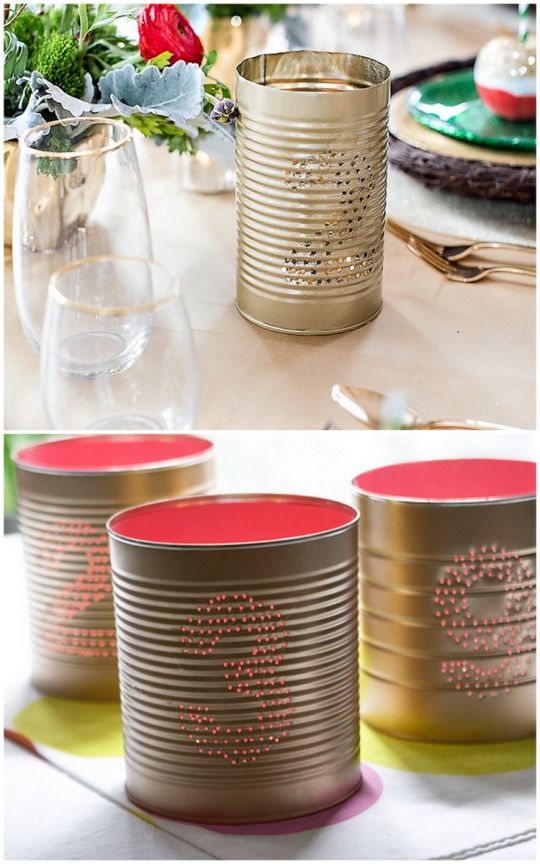
Spray the exterior gold, paint the interior coral or pink, then punch numeral patterns so candlelight glows through “2,” “3,” and the rest. Guests read the number; photographs catch the metallic sheen. Make a full set once and reuse for every seated dinner.
12. Blue vertical wall garden
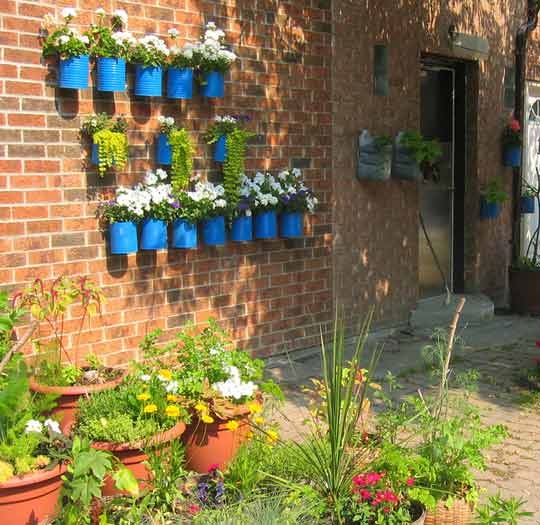
Mount rows of electric-blue cans to brick with sturdy brackets or screws into mortar-safe anchors. Add drainage, potting mix, and trailing greens or white blooms. The color contrast against red brick does half the design work; watering from the top row down keeps maintenance sane.
13. Personalized “just married” car cans
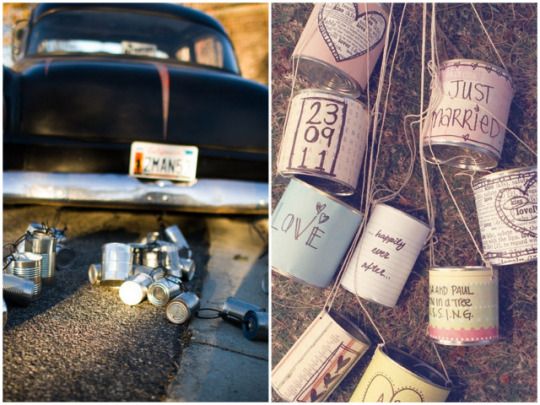
Paint pastels, letter dates and names, add hearts and scrap borders, then string cans so they clatter safely behind the getaway car. Soften sharp edges; use strong twine tied to the bumper hitch points recommended by whoever owns the vehicle. Keep a plain metallic set if you prefer the classic noise without decoration.
14. Sideways tin can desk clock
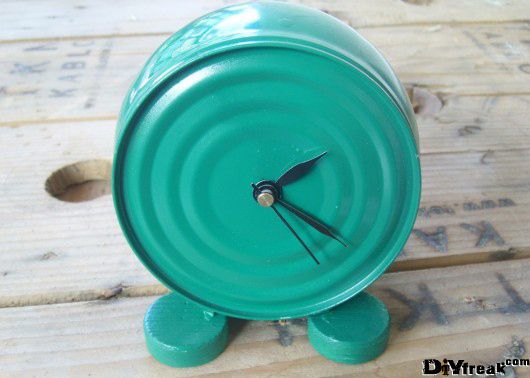
Lay a can on its side so the circular end becomes the clock face. Paint teal, add a quartz clock movement through a center hole, and prop with small painted disc feet. The can ridges become unintentional concentric dial rings—no printed numbers required if you like a minimal look.
15. Polka-dot and burlap craft carousel
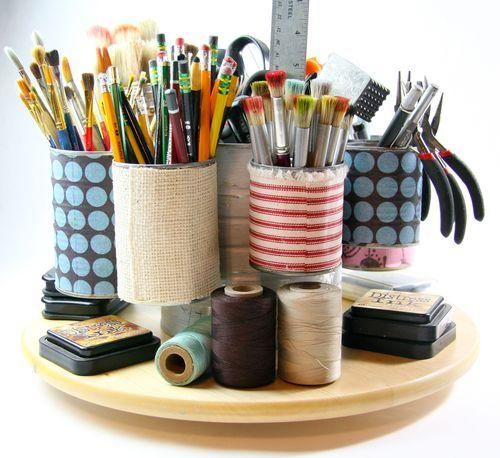
Cover cans in polka-dot fabric, burlap, and striped ribbon, then arrange heights on a lazy Susan with brushes, pliers, and ink pads on the tray. Hot-glue bases so nothing tip when you spin. This is the grown-up sibling of a school art caddy—built for makers who dig for tools constantly.
16. Stacked pink thread-storage cans
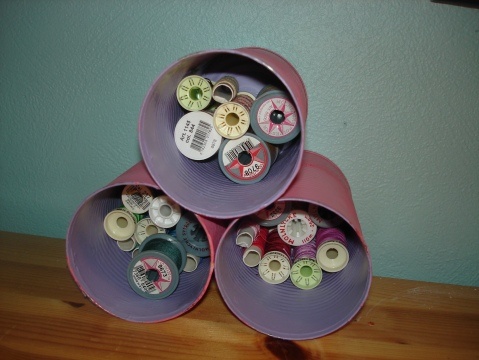
Paint exteriors dusty pink and interiors soft purple, then lay cans on their sides in a triangle stack so spools nest inside like cubbies. Visible color coding beats opaque drawers. Glue the stack if you want permanence, or leave loose so you can reshuffle by project.
17. Berry-print tin pincushion
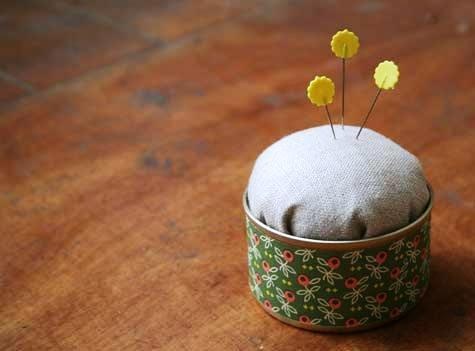
Wrap a shallow can in berry-pattern paper, stuff a linen circle with fiberfill until it domes above the rim, and tuck the cushion firmly in place. Flower-head pins look charming and stay where you left them. A tuna-size tin is ideal—stable, small, and gift-ready.
18. Patriotic hanging windsock cans
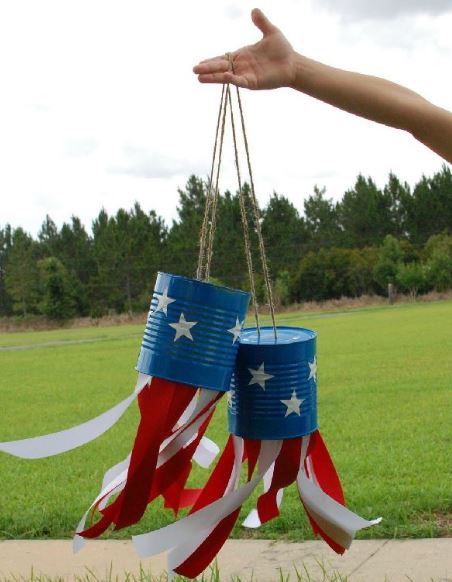
Paint cans blue, add white stars, glue alternating red and white ribbons to the bottom rim, and hang from twine. They read festive for summer holidays without needing fireworks props. Store flat ribbons separately if you reuse the cans next year.
19. Colored-pencil wrapped pencil cup
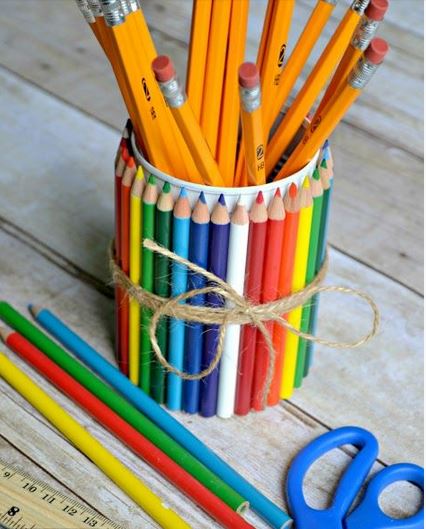
Glue sharpened colored pencils vertically around a short can, cinch the middle with twine, and fill with ordinary yellow pencils. It is cheerful teacher-gift territory: useful, recognizable, and made from leftovers plus one empty can.
20. Bare-metal rotating art station
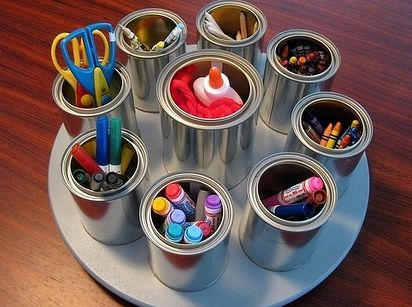
Skip decoration and screw clean silver cans of mixed heights to a round turntable—center can for glue, outer ring for scissors, markers, crayons, and sticks. Industrial shine suits classrooms and shared craft tables where patterned paper would wear fast.
21. Punched-tin wall candle sconce
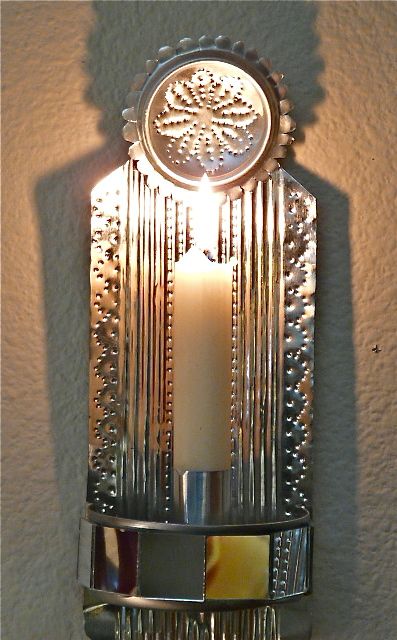
Flatten and join can metal into a vertical backplate with punched borders, add a scalloped lid medallion at the top, and form a mirrored collar to hold a taper. Mount clear of curtains. The warm reflection is folk craft at its best—scrap metal turned into wall light.
Choosing your first can
Start with something washable and reversible: a painted utensil cup or paper-wrapped pencil holder. Move to punched luminaries once you are comfortable drilling into ice-filled cans. Save stilts, sconces, and cut filigree for days when you have gloves, time, and a clear work surface.
Keep a small stash of clean cans by size so inspiration does not wait on dinner leftovers. When the rim is safe and the paint is dry, the “waste” object stops looking temporary—it starts looking like the project you meant to make.

Comments
Continue reading
DIY Patchwork Tutorials: Clutches, Pillows, Furniture, Hexies, and Bags
Turn fabric scraps into patchwork clutches, pillows, chair and headboard covers, hexagons, wall pieces, dresses, trivets, and bags with pressing tips.
Knit Kitchen Tools You Will Actually Use
Dishcloths, pot holders, bowl cozies, and other small knits for the kitchen—yarn choices, cotton vs wool, and projects that survive heat, water, and daily mess.
Botanical Christmas Ornaments from Citrus, Herbs, and Dried Flowers
Dried orange slices, rosemary, bay, and pressed flowers as tree ornaments—how to dry, string, and store them so they last the season without going moldy.