
DIY Projects While Getting a Loft Conversion: Planning and Finishing Ideas
A planning guide for homeowner tasks around a loft conversion—layout, paint, eaves storage, furniture access, and rental considerations—while structure and services stay with the pros.
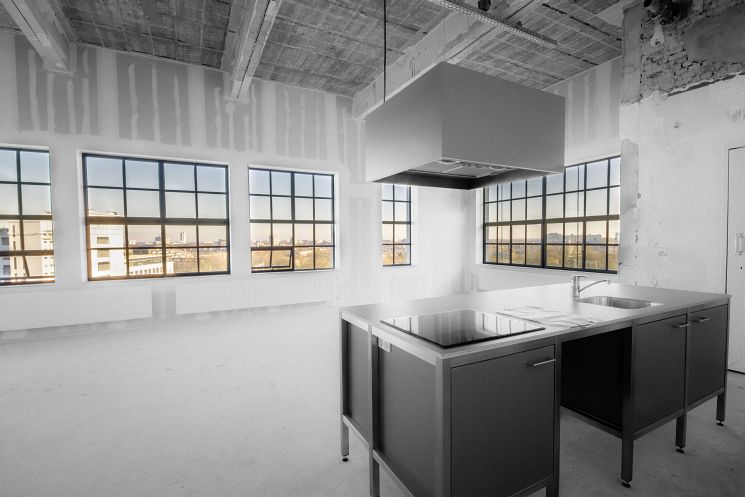
A loft conversion opens square footage you already own, but the messy middle of the project is also a rare window for extras that are awkward later: painting before furniture arrives, routing storage into eaves, planning furniture that can actually fit up the new stairs, and deciding whether the room is a bedroom, studio, lounge, or rental. The structural work, stairs, insulation, fire safety, and electrics belong to qualified trades and local rules. What you can own as a homeowner is the planning—and a set of finishing projects timed so they help the build instead of colliding with it.
Think of this as a planning and ideas guide for the DIY-friendly layer around a loft conversion, not a substitute for architects, structural engineers, or building control.
Decide the room’s job before you shop for furniture
Empty volume invites fantasy. Write one primary use on paper: guest bedroom, primary suite, office, playroom, cinema corner, or rental studio. Secondary uses are fine; competing primary uses create clutter and bad lighting choices. A guest room that also hosts a full-size pool table usually fails at both.
Measure the finished floor area you expect after insulation and knee walls, not the raw attic footprint. Eaves storage is wonderful, but usable standing height is what determines bed placement and desk height. Sketch the stair arrival zone; you need clear landing space so the first step into the room does not hit a bed frame.
Budget early. Conversions vary widely by roof type, access, windows, and finish level. Keep a contingency for discoveries in old roofs. Your DIY list should spend time and modest materials money—paint, built-in shelves in dead corners, window treatments—not attempt structural openings.
Open loft volume rewards a clear plan for light, circulation, and furniture scale.
Light, paint, and finishes while the room is empty
Paint is the classic “do it while the loft is empty” project. Cover floors, mask windows, and paint ceilings and walls before large furniture arrives. Loft ceilings often include slopes; cut in carefully along roof lights and collars. Lighter colors bounce daylight from dormers and skylights; a single deeper accent wall can define a sleeping zone without shrinking the whole volume.
Coordinate paint with flooring and trim decisions so you are not touch-up painting around a newly installed wardrobe. If trades are still sanding or plastering, wait until dust settles—paint over fine dust looks fine for a week and terrible forever.
Window treatments for roof lights differ from regular curtains. Measure carefully, consider heat and blackout needs for a bedroom, and install only when openings are finished and weather-sealed. Temporary paper blinds are fine during the build; final shades can wait until cleaning is done.
Furniture that fits the stairs and the eaves
A larger wardrobe or bed is easier to place when you can still carry pieces up before banisters, tight turns, or finished walls constrain the path. Measure stair width, landing turns, and hatch openings. Flat-pack furniture that assembles in the loft beats a solid antique that will not corner the new stair.
Use eaves for drawers, pull-out bins, or short hanging rails. Custom or semi-custom low units turn awkward triangles into storage so the tall center of the room stays calm. Leave access panels where services need future attention—do not bury junctions behind sealed carpentry without a plan.
If the loft will be a bedroom, plan outlets and lighting zones with your electrician during first fix, then choose bedside tables and wardrobes that match those points. Moving a socket later is more expensive than deciding a bed wall now.
Entertainment layouts need clearance, not just gadgets
Game rooms and lounge lofts are popular because the floor plate can be open. A pool table is the classic temptation and the classic regret: you need play clearance on all sides, a level floor, and a path to carry slate or modular pieces upstairs. Measure twice. If clearance fails, consider a dining-sized table that converts, or skip the table for a projector screen and comfortable seating instead.
Arcade cabinets, dart boards, and speakers need wall space, vibration awareness, and neighbor-friendly volume if you share a building. Soft finishes and rugs help acoustics under high ceilings. Skylights set the mood; plan seating so afternoon glare does not hit screens directly, or add simple shades.
Party-ready lofts still need storage for the ordinary week: closed cabinets for games, a place for coats at the stair, and enough empty floor that the room can return to calm. Design for Tuesday night, then invite Friday night to visit.
If the loft might become a rental
Rental use raises the planning bar. Local rules may treat a self-contained loft differently from a family room. Fire escape routes, smoke detection, insulation, sound, and sometimes separate utility metering matter. Isolated access that does not march through another household’s private rooms is often essential for peaceful tenancy.
Questions to settle early:
- Can occupants reach the street without crossing another private bedroom hallway at night?
- Will the loft share a bathroom, or does it need its own—and is that plumbing realistic in the roof void?
- Are kitchens or kitchenettes allowed under your local regulations for this building type?
- How will waste, mail, and parcel delivery work without friction?
- Does the building’s wiring and consumer unit have capacity for another heavy-use space?
Those answers belong in conversations with designers, landlords (if you lease), and building professionals—not in a weekend DIY sprint. Your DIY role might be furnishing a durable, easy-clean finish once compliance work is signed off.
A practical sequence for homeowner tasks
- Confirm permissions, structure, and trade scope with qualified people.
- Lock the primary use and a rough furniture layout on graph paper.
- Coordinate first-fix services (power, lighting points, data, any wet rooms) with that layout.
- After plaster and flooring, paint and seal while the volume is empty.
- Install storage in eaves and built-ins that need clear walls.
- Carry large furniture up while access is still manageable.
- Add textiles, lighting layers, and entertainment gear last.
Protect the stair and new finishes during every carry. A blanket-wrapped banister and a no-shoes rule save arguments with whoever just installed the carpet.
What not to DIY on a loft conversion
Do not cut structural members, alter trusses, or open the roof without engineering guidance. Do not improvise fire doors, escape windows, or load-bearing stairs from a video. Do not run gas appliances into the loft without proper flues and certification. Electrics and plumbing for bathrooms should be done by people who can certify the work where your region requires it.
Your best DIY projects are the ones that assume the shell is sound: layout thinking, painting, storage carpentry within non-structural zones, furniture assembly, and styling. Those jobs make the expensive conversion feel finished.
When the last trade leaves and the loft still smells faintly of paint, walk the empty floor once more with your sketch in hand. Does the bed wall still make sense? Is there room to walk past the desk without clipping a knee wall? If something feels wrong, move the paper plan before you move the heavy pieces. The conversion already bought you the volume; a calm layout is how you keep it usable for years.

Comments
Continue reading

Photo vs Illustrated Save-the-Dates: How to Choose a Format
A practical comparison of photographic and illustrated save-the-dates—when a portrait earns the stamp, when a drawing carries the date, and how to match format to venue, guests, and printing.

Escort-Card Displays That Aren’t a Table of Tiny Cards
Walls, branches, envelopes, mirrors, and numbered installations—how to stage escort cards so guests find their tables without a crowded lobby table.

Berry, Brick, and Brown Lipsticks That Still Read as Color
A guide to berry, brick, and brown lipsticks—undertones, finishes, and light—when classic fire-engine red is not the shade you want to wear.