
Five DIY Projects From Old Magazines
Turn glossy leftovers into a waste basket, picture frame, woven basket, coasters, and a folded magazine bag—low-cost paper crafts with real how-to steps.
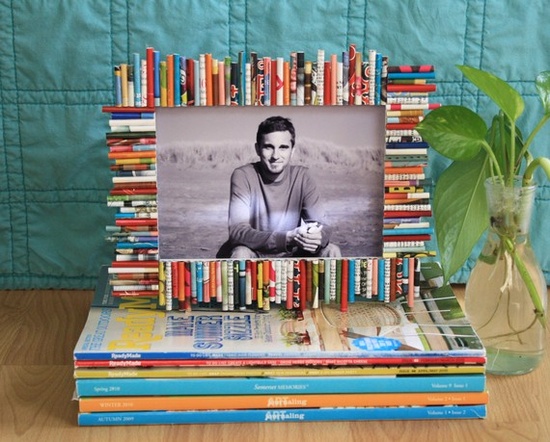
Old magazines stack up fast: catalogs, weekend glossies, airline freebies, half-read issues destined for the recycling bin. Before they go, the paper still holds color blocks, bold typography, and glossy stock that craft projects love. Magazine DIY is not about pretending paper trash is precious metal. It is about turning printed pages into small, useful objects—baskets, frames, coasters, bags—without buying specialty craft kits.
These five projects stay on the low-to-no-cost side. You will need scissors or a craft knife, glue (white craft glue, glue stick, or Mod Podge-style sealer), a ruler, and patience for folding and rolling. Optional extras: cardboard for structure, clear contact paper or sealant for coasters, a stapler for quick joins. Work on a covered table; ink and glue transfer easily.
1. Paper waste basket for a desk corner
A magazine waste basket is basically a sturdy cylinder or tapered bin wrapped or built from folded pages. Start by choosing a base: an existing small cardboard bin you want to cover, or a form you build from heavier cardboard cut into a bottom circle or square plus side panels. Cover every visible surface with magazine strips or full pages, overlapping like shingles so bare board never peeks through.
For a cleaner look, sort pages by color family—deep blues together, neutrals together—before you glue. For a louder look, mix randomly and let headlines become accidental collage. Seal the outside with a thin coat of clear medium so the bin survives light knocks. Keep this one for dry trash only (paper scraps, wrappers). Liquid and heavy kitchen waste will destroy paper walls.
Desk-scale is the sweet spot: tall enough for a day’s receipts, narrow enough that it does not dominate a room. If the bin feels soft, reinforce the rim with an extra rolled magazine tube glued under the lip.
2. Picture frames (and a mirror cousin)
Rolled or folded magazine tubes make one of the most recognizable upcycled frames. Cut pages into long strips, roll each strip tightly around a skewer or pencil, glue the end, and slide the tube off. Build a rectangular border by gluing tubes side by side on a cardboard backing with a window cut for the photo. Vary tube diameters slightly for texture, or keep them uniform for a neat ribbed edge.
If you have a surplus of magazines and an afternoon, scale the same method into a mirror frame: larger cardboard ring or square, more tubes, heavier glue, and a sealed finish so bathroom humidity does not lift the paper overnight. Hang with proper hardware rated for the mirror’s weight—paper craft is decoration; the hanging system is safety.
Photo tip: use a simple print or a favorite snapshot behind glass or clear acetate so dusty paper edges do not touch the image. The frame should feel handmade, not fragile.
3. Woven magazine baskets
Woven baskets turn pages into structural strips. Fold pages repeatedly into flat, sturdy “reeds,” then weave them over-under around a cardboard base or freehand into a round coil. Square baskets suit desktop organizers and mail catchers; round ones work as table centerpieces for pinecones, remote controls, or rolled napkins.
Technique notes that save frustration:
- Fold tightly. Soft reeds collapse when weaving tension rises.
- Glue the last fold of each reed so it cannot unroll mid-weave.
- Start with a solid base—cardboard circle or square—then stitch or glue the first row firmly before building walls.
- When the wall reaches height, fold and tuck ends inside, gluing them flat so the rim does not fray.
Color strategy matters here more than in a covered bin. A basket woven from one magazine’s palette can look intentional; a basket woven from random junk mail can look muddy. Sort first. Seal lightly if the basket will sit near drinks, but do not expect paper weave to behave like ceramic.
4. Magazine coasters
Coasters are the fastest gift-scale project in this set. Two common approaches work well:
Rolled spiral: Cut long thin strips, roll into a tight coil like a cinnamon bun, glue the end, and flatten gently under a heavy book overnight. Seal top and bottom with several coats of waterproof finish, letting each dry fully. Cork or felt pads on the underside protect furniture.
Laminated collage: Cut interesting typography and color blocks into squares or circles, layer onto cardboard coaster blanks, then cover with clear contact paper or brush-on sealer. Trim edges clean.
Either way, test with a cold glass before you gift a set. Unsealed magazine ink can ghost onto pale tabletops. Thickness matters: too thin and the coaster curls; too thick and mugs wobble. Aim for the thickness of a store-bought cork coaster.
Make sets of four or six in related colors. Coasters are versatile gifts because they suit almost any kitchen without needing a perfect size match the way clothing does.
5. Folded and woven magazine bags
A magazine purse or small tote is the showpiece project: folded page panels woven or latched into a bag body, sometimes with a cardboard base insert and a simple handle of twisted paper or a thrifted strap. Choose pages for a color story—monochrome fashion spreads, green nature issues, or a rainbow scramble—and fold each page into a consistent module so the weave locks evenly.
Expect this one to take longer. Measure your modules, dry-fit the weave before gluing, and reinforce stress points (handle joins, bottom corners) with extra glue and maybe a hidden strip of fabric or packing tape inside. This bag is best as a light clutch for keys, cards, and a phone—not as a grocery hauler. Rain is the enemy; if you must carry it outdoors, add a clear sealant and accept that paper fashion is partly costume.
For a first attempt, make a mini version the size of a glasses case. Skills transfer to a larger purse without wasting a whole stack of good pages on a failed first weave.
Working smart with printed paper
- Sort pages into color piles before any cutting. Decision fatigue mid-project creates muddy results.
- Keep a “sacrifice” magazine for practice rolls and failed folds.
- Ventilate when sealing; many clear coats are sharp-smelling.
- Store finished pieces away from direct sun so colors fade slower.
- Recycle scraps you will not use. The point of upcycling is not to create a second trash pile of unused triangles.
Start with coasters if you want a same-day win, or with a small woven basket if you want something that earns its keep on a shelf. Save the mirror frame and the woven bag for a weekend when you can spread out, play music, and treat the glossy pile as raw material instead of guilt.

Comments
Continue reading
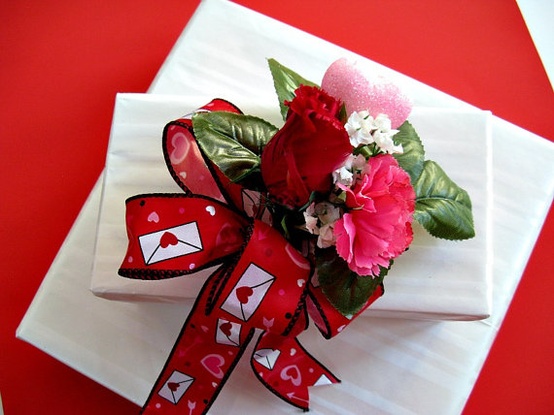
Simple, Cute Valentine Gift Wrapping Ideas
A craft guide to personalized Valentine wraps—kraft bases, paper hearts, ribbon, tags, and texture mixes—using inexpensive supplies and the gallery examples as patterns.
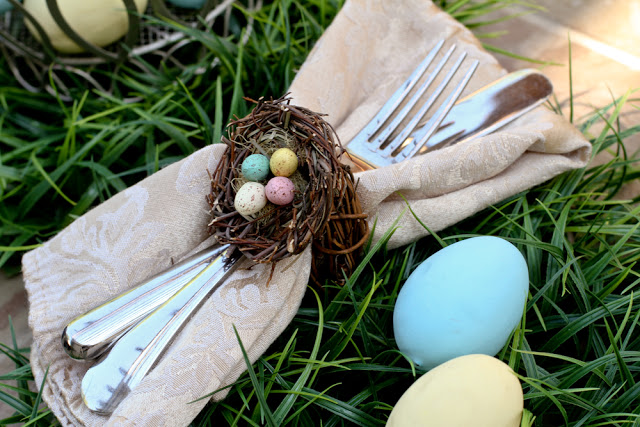
DIY Spring and Easter Napkin Rings for the Holiday Table
Make Easter and spring napkin rings—nest, knit flower, bunny, scrap-flower, and edible styles—with sizing, food-safety, and batch tips for a calm tablescape.

20 DIY Shoe Makeover Ideas: Paint, Glitter, Clips, and More
Twenty shoe upgrades—floral boots, glitter wedges, neon soles, crystal pumps, lace overlays, and novelty heels—with practical steps for each.